
Quick start
1. Install and set a credit limit
- Install Lilya: House Accounts for POS. The app opens on the Free plan, which includes up to 3 house accounts with every feature; you can change plans later.
- On the app home, go to Open an account and search for the customer by name, email, phone, or customer ID. (On the Accounts page, Open account opens the same form.)
- Select the customer, enter a Credit limit such as 500, and select Save limit. "Credit limit saved" confirms it.
The customer now has a house account and is listed on Accounts with a $0.00 balance. A limit of 0 keeps the account but allows no new sales on account.
Sales on account use Net 30 payment terms by default. To change the terms or require a PO number on every sale, see Settings. To give one customer other terms, put an account on hold, or keep a note for staff, use the account page; see Accounts and aging.
2. Add the Charge to account tile to POS
Shopify doesn't add app tiles to POS automatically. Add the tile once per location, or once per smart grid template:
- In Shopify POS: on the home screen tap Add tile, choose Lilya: House Accounts for POS, then Charge to account, and tap Save.
- Or in Shopify admin: Point of Sale › POS app › Edit › smart grid › Add tile › Embedded apps, and add Charge to account.
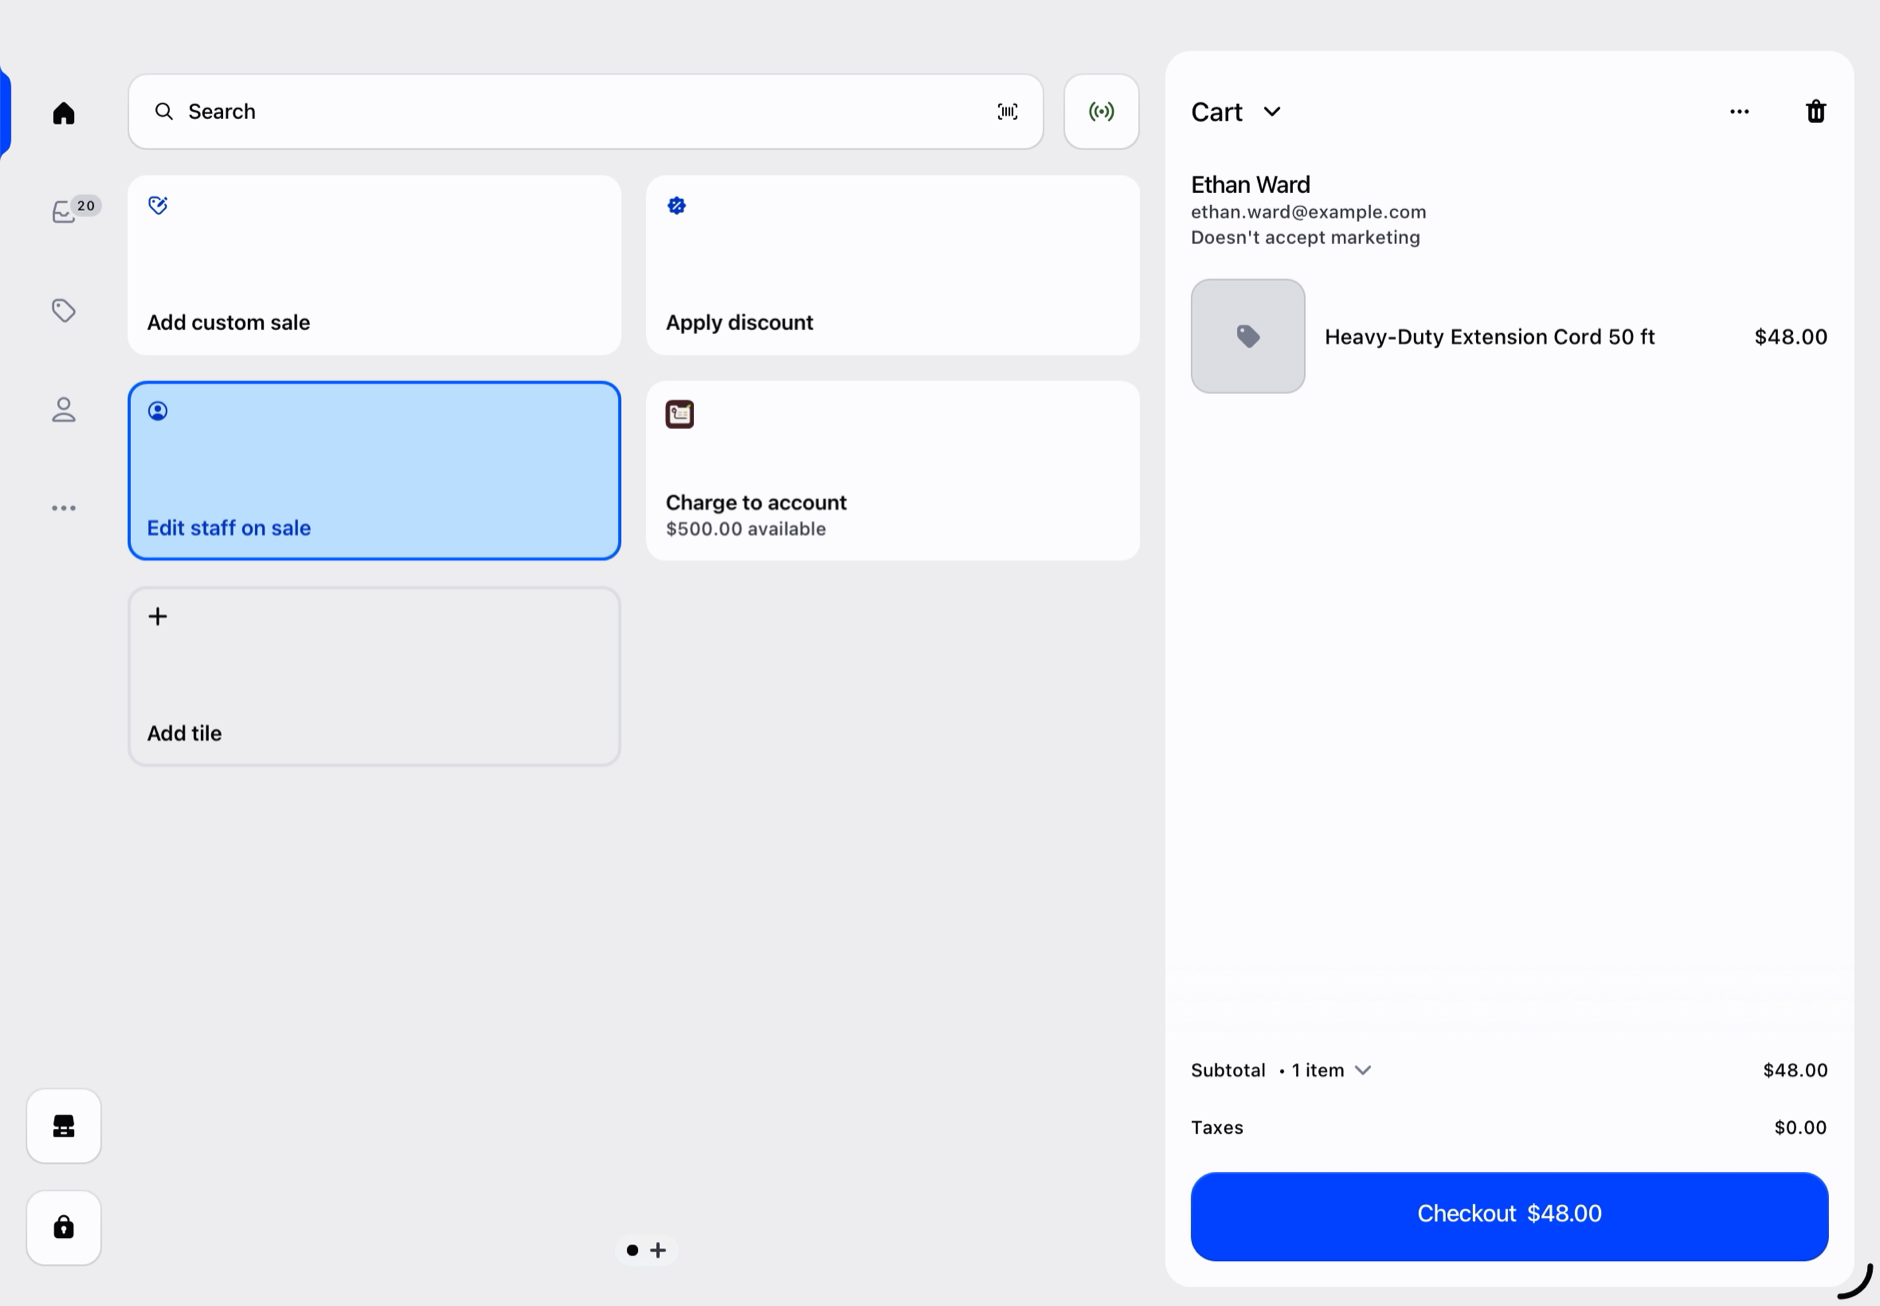
Turn on the customer screen block
The House account block on the POS customer screen also needs turning on once, because Shopify doesn't turn app blocks on automatically: in Shopify admin go to Point of Sale › POS app › Edit, open Apps (the grid icon), choose Charge to account, turn on Activate on (Customer details) and select Save.
3. Sell on account
- In POS, add the items to the cart and add the customer to the cart.
- The tile shows the customer's available credit, for example $500.00 available. Tap it.
- Check the account and the sale, type a PO number (optional), and tap Charge $… to account.
- The success screen shows the order number. Tap Print receipt (store + customer copy) to print a receipt for the customer to sign, then Done.
The order appears in Shopify admin → Orders as payment pending, with the payment terms (Net 30 by default), the PO number, and the tag house-account. The customer's balance in the app goes up by the sale total.
Read Sell on account in POS for every tile state and message.