
Applications and the form block
The program page
Your program page is at /apps/pro on your online store (for example https://your-store.com/apps/pro). It uses your theme's header and footer and shows, depending on who visits:
| Visitor | Sees |
|---|---|
| Not logged in | A prompt to log in or create an account, or the form directly if Accept applications without a customer account is on |
| Logged in, no application | The application form |
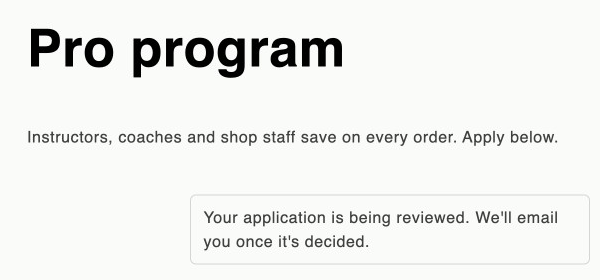
| Application waiting for review | "Your application is being reviewed. We'll email you once it's decided." |
| Active member | Their membership: status, discount, end date |
| Membership ending within 30 days, in the grace period or ended | Their membership and Request renewal (with a proof upload if you ask for new proof) |
What the applicant fills in depends on Settings → Applications: First name, Last name, I'm applying as (when you ask for a group), Company or organization, Role or job title, Anything else we should know, Invite code (when you have codes), Proof that you qualify, the terms box (when you have terms) and the optional Email me news and offers (optional). A logged-in customer sees "Applying as" with their e-mail instead of an e-mail field. After Submit application they see "Thanks — we received your application. We'll email you once it's reviewed.", or "You're in! Your membership is active…" when they were approved automatically.
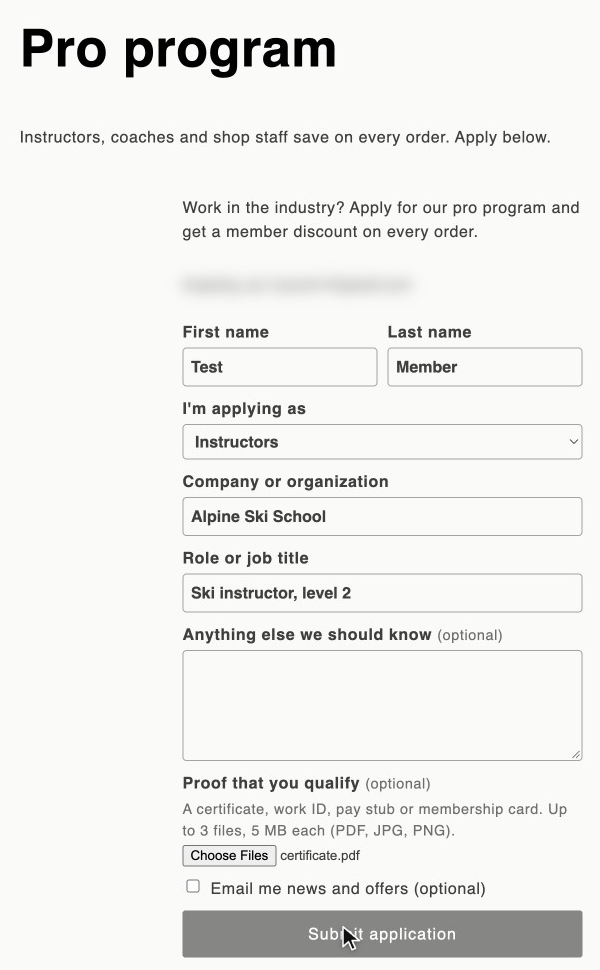
The heading, introduction and terms come from Settings → Program page; the questions from Settings → Applications. The page follows the language of your storefront: English, German, French, Spanish, Italian, Dutch or Turkish.
The form on any page
The Pro program application theme block shows the same form, messages and member status inside one of your own pages, so you can put your own text, images and FAQ around it.
The quickest way:
- On the app home, in the Setup guide, select Add form block (under Show the application form in your store).
- The theme editor opens on the default page template with the Pro program application block added in a new Apps section.
- If your pro page uses another template, pick it from the template menu at the top of the theme editor, and add the block there (Add section → Apps → Pro program application).
- Select Save in the theme editor, then Mark as done in the Setup guide.
By hand, for a page of its own:
- In Shopify admin create a page, for example "Pro program" (Online Store → Pages). Write your own text: who qualifies, what they get, an FAQ.
- Open the theme editor on that page (Online Store → Themes → Customize, then choose the page or its template).
- Add section (or Add block) → Apps → Pro program application, and Save.
- Link the page from your menu.
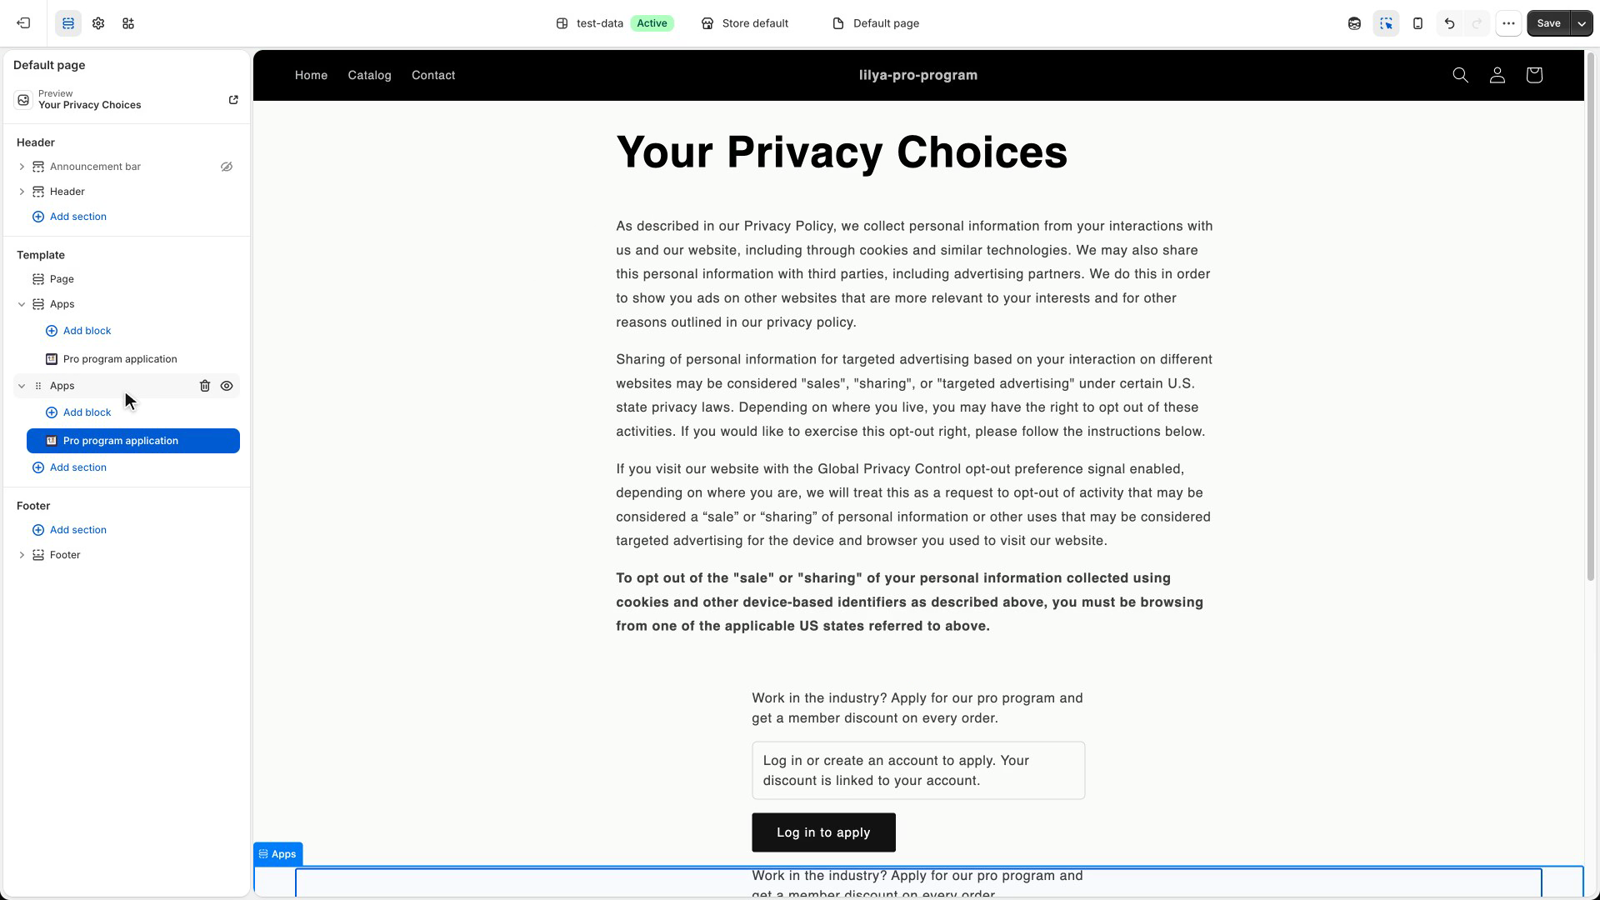
Block settings: Show the program heading and Show the introduction (turn them off if your page has its own). Visitors stay on your page when they submit; if they need to log in, they come back to the same page afterwards.
Default page template
The block on the default page template shows on every page that uses that template, for example "About us". To show the form on one page only, create a separate page template (for example page.pro) in the theme editor, assign it to your pro page in Online Store → Pages, and add the block to that template.
Review applications
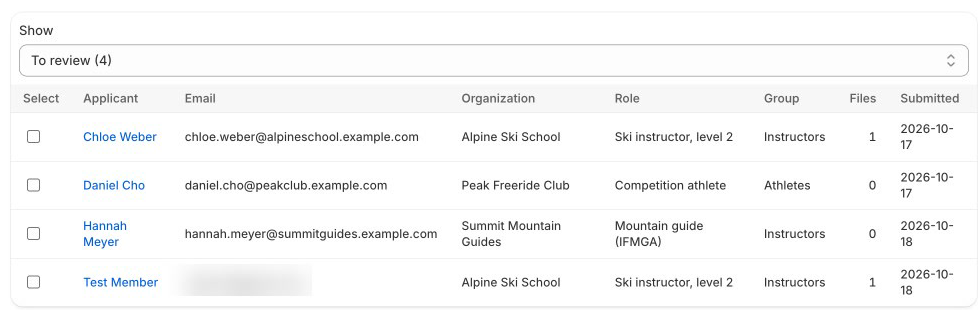
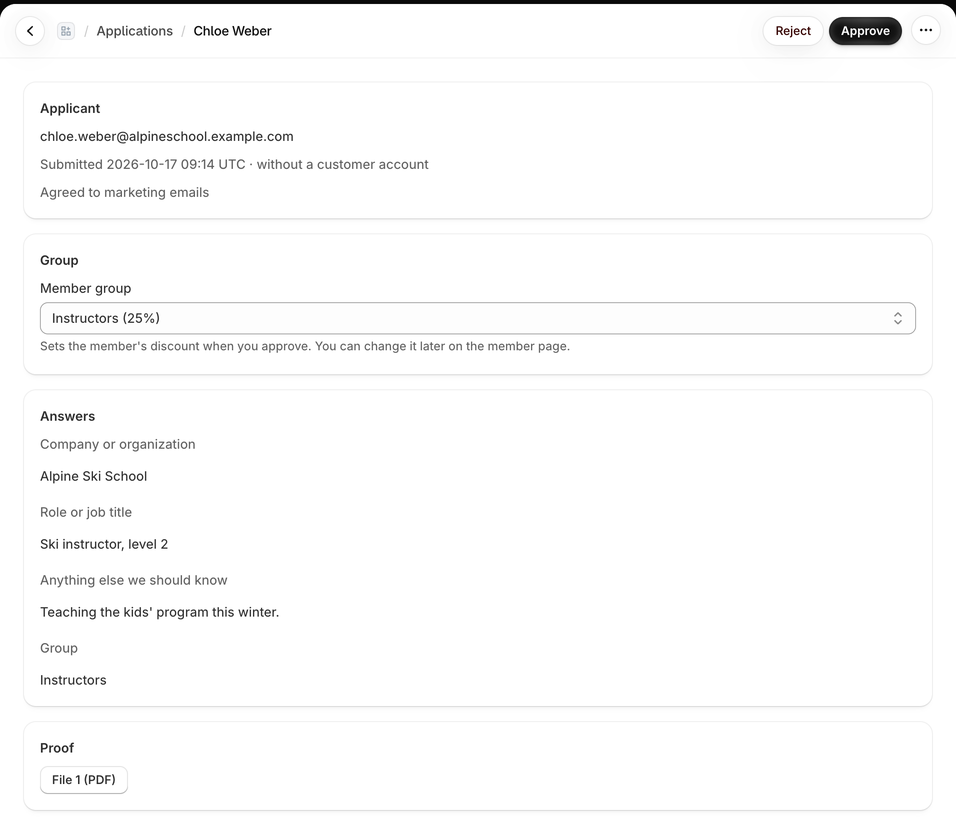
Open Applications. Show switches between To review, Approved and Rejected. The table shows the Applicant, Email, Organization, Role, Group, Files and Submitted date; renewal requests have a Renewal badge. The app home's Needs attention links here too ("3 applications to review").
Open an application to see:
- Applicant — name, e-mail, whether they agreed to marketing e-mails, and a note if the same e-mail has other applications.
- Answers — the questions you ask.
- Proof — the uploaded files. Select one to open it. Files are private; only staff signed in to the app can open them.
- Group — the group the applicant chose. Change it before approving if needed.
Then:
- Approve starts the membership today (end date from Settings → Membership), applies the discount and sends Welcome to the program. If the applicant applied without an account, the app finds or creates the Shopify customer with that e-mail.
- Reject asks for a Reason (sent to the applicant) — optional, keep it short and polite — and sends Application not approved. The applicant can apply again.
To approve several at once, tick them on To review and select Approve … selected (up to 25 at a time).
Automatic approval
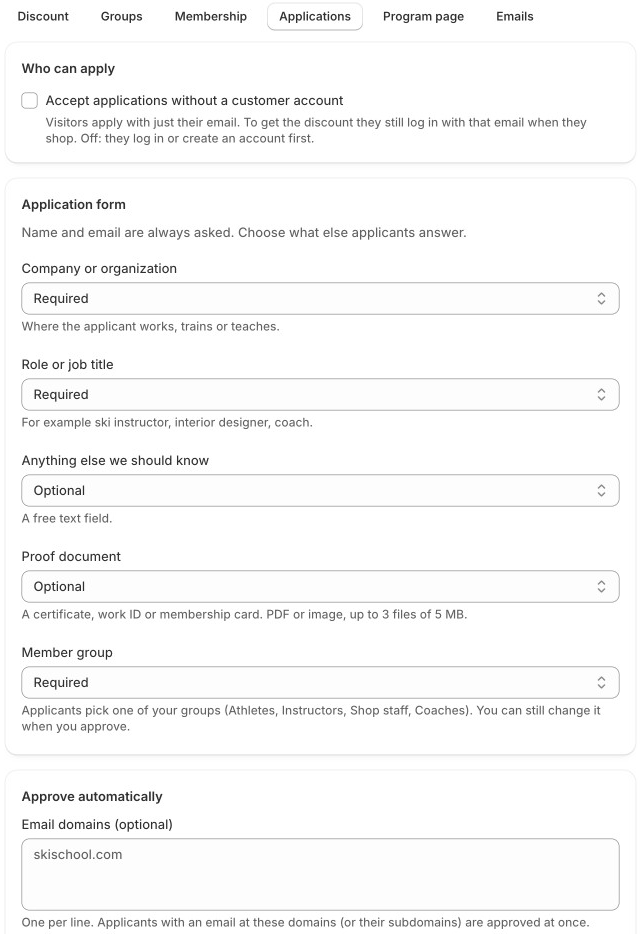
In Settings → Applications:
- Email domains — applicants with an e-mail at one of these domains (or a subdomain) are approved as soon as they apply.
- Invite codes — applicants who enter one of these codes are approved at once. Give one code per partner school, club or employer.
Automatic approvals appear under Approved; the member's history says how they joined (domain or code). If you're over your plan's member limit, the application waits under To review instead.
Example: an interior design trade program
You work with two design studios, Northlight Interiors and Atelier Kova, and want their designers in without review. Independent designers should send a business certificate.
- Settings → Applications: Company or organization and Proof document → Required.
- Email domains (optional), one per line:
northlight-interiors.com atelierkova.com - Select Save.
Now anna@northlight-interiors.com (or anna@studio.northlight-interiors.com) is approved the moment she submits; sam@gmail.com lands under To review, and you check his certificate before you Approve. Proof is still asked of everyone the form requires it from, so domain applicants upload it too; set Proof document to Optional if that bothers them.
Invite codes work the same way for groups without a shared domain: give the code ALPINE-2027 to one ski school, and anyone who enters it is approved at once (upper or lower case doesn't matter). Remove a code from the list to stop it working.
Renewal requests
When a membership is ending within 30 days, in its grace period, or has ended, the member can select Request renewal on /apps/pro, in the form block or in the Pro membership block of their customer account.
- Without Ask for new proof when members renew, the member shows Renewal requested on Members and in Needs attention. Open the member and select Renew.
- With it, the member uploads a new document and the request appears under Applications with a Renewal badge. Approve renewal starts the next period; Reject keeps the current end date.
Customer account block
The Pro membership block on the customer account Profile page shows Active, Active — ending soon or Ended, the end date, the discount left this period and a renewal or apply link. It needs Shopify's customer accounts (not the legacy ones) and is in English.
- On the app home, in the Setup guide, select Open customer accounts (or go to Settings → Customer accounts → Customize in Shopify admin).
- In the editor, open the Profile page.
- Add block → Pro membership, then Save.
- Back in the app, select Mark as done.
Common questions
Can someone apply twice? Yes, for example after a rejection. The application shows a note when the same e-mail has other applications, so you can compare.
Can I approve without a proof document? Yes. Proof is something you ask for; whether it's enough is your decision.
Where are proof files kept? Privately, with the app. Only staff signed in to the app can open them. They're deleted with the applicant's data when Shopify asks for it, and when you uninstall.
Can I change an applicant's group? Yes, in Group → Member group on the application before you Approve, or later on the member page.
Do automatically approved members get the welcome e-mail? Yes, like members you approve by hand.